
Tiny Titan Guide
Thank you for purchasing the Tiny Titan Table.
This is the 2022 Guide for the Tiny Titan with the rotating middle bar:
If you have any questions please give us a call or email, or view the 2021 model below for further photos which may be of assistance.
Here are steps for the 2021 and previous versions of the Tiny Titan before the rotating bar was added, this is not necessary to view unless you need guidance on an older model or want to view some of the additional photos for similar steps such as attaching the legs.
The installation can be slightly counter intuitive, so we have added some extra photos to help with the orientation when assembling this table.
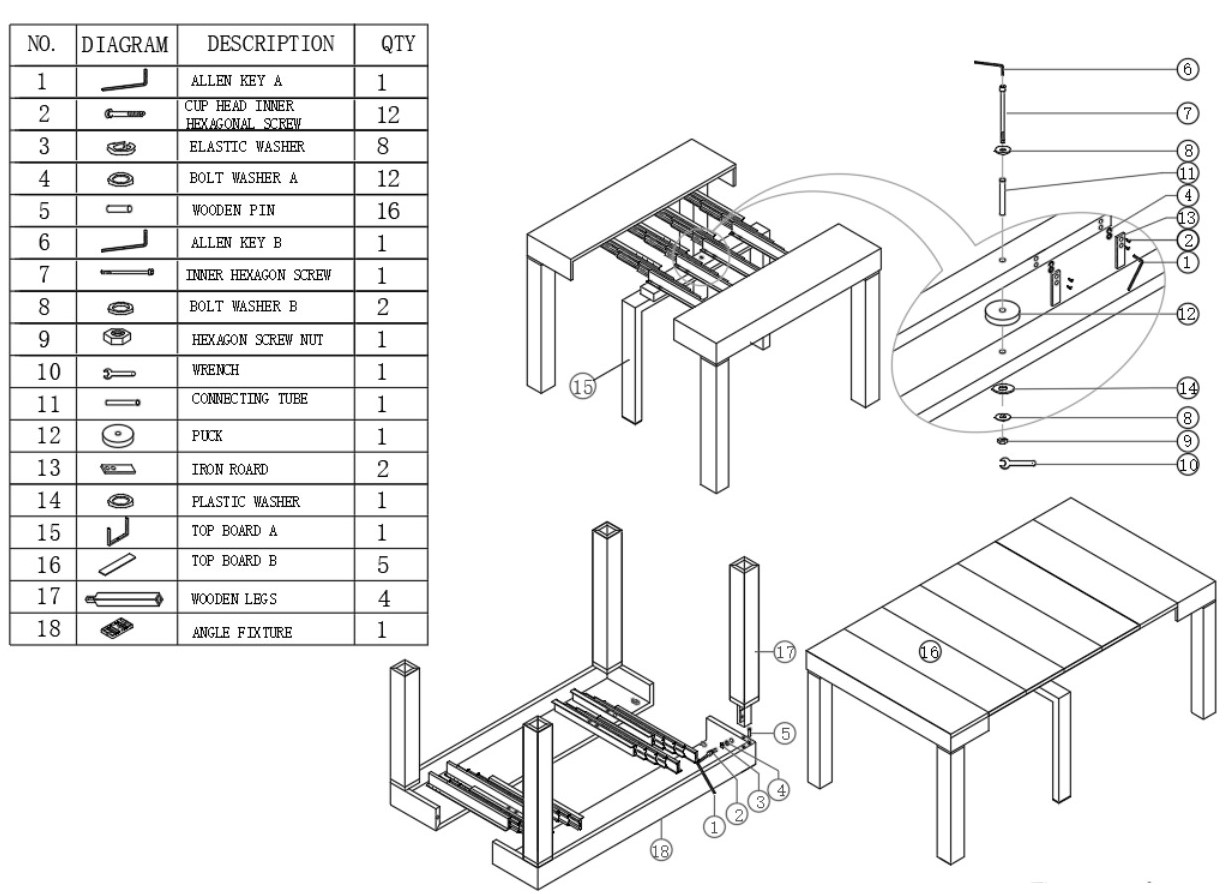
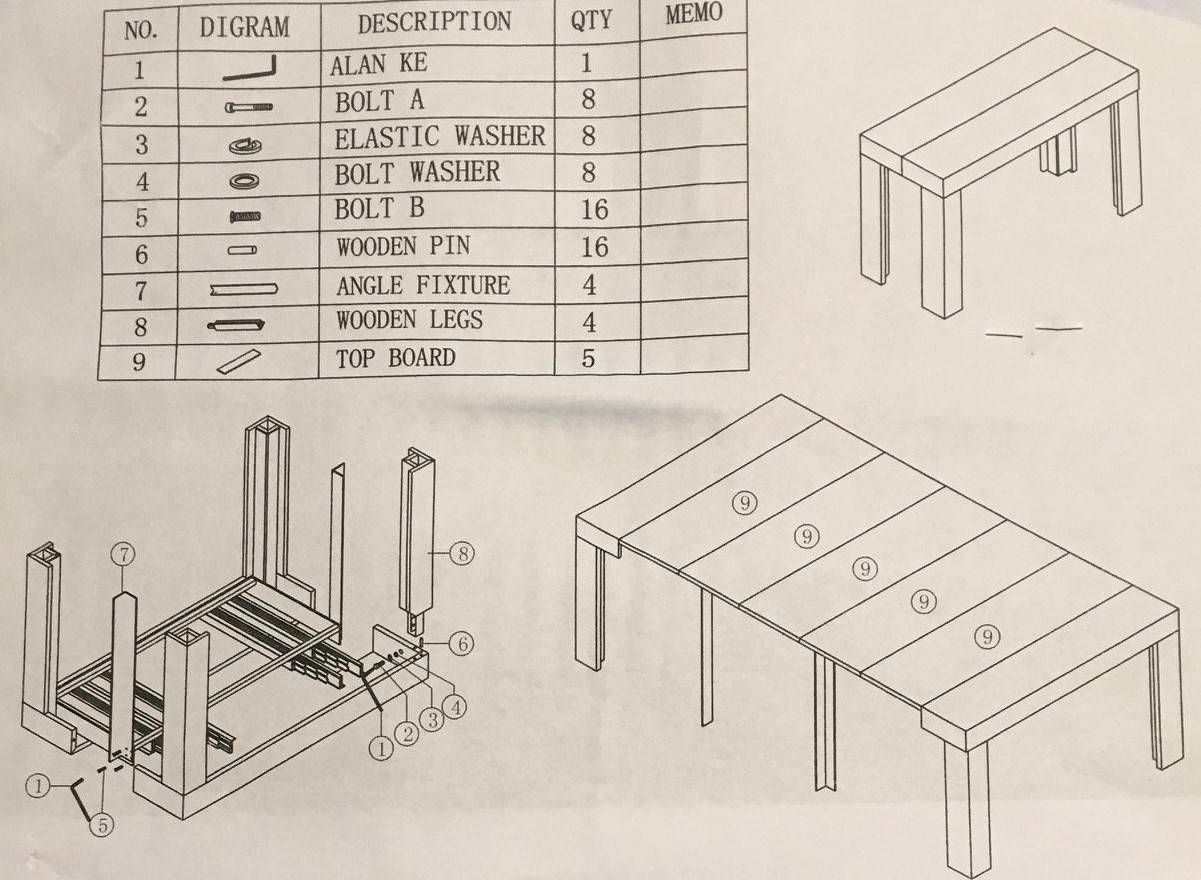
Example of the installation guide, the angle fixture #7 (metal legs) should receive extra attention during the installation as this can be incorrectly attached, this is easy to adjust if done incorrectly, but by following this guide you should be able to set this up correctly the first time.
Ignore “red button” instruction comment. This is now a latch, de-latch to open the table once unpacked to begin assembly. Place table on the floor as per instruction drawings carefully to assemble legs.

Step One: Pull table several inches apart
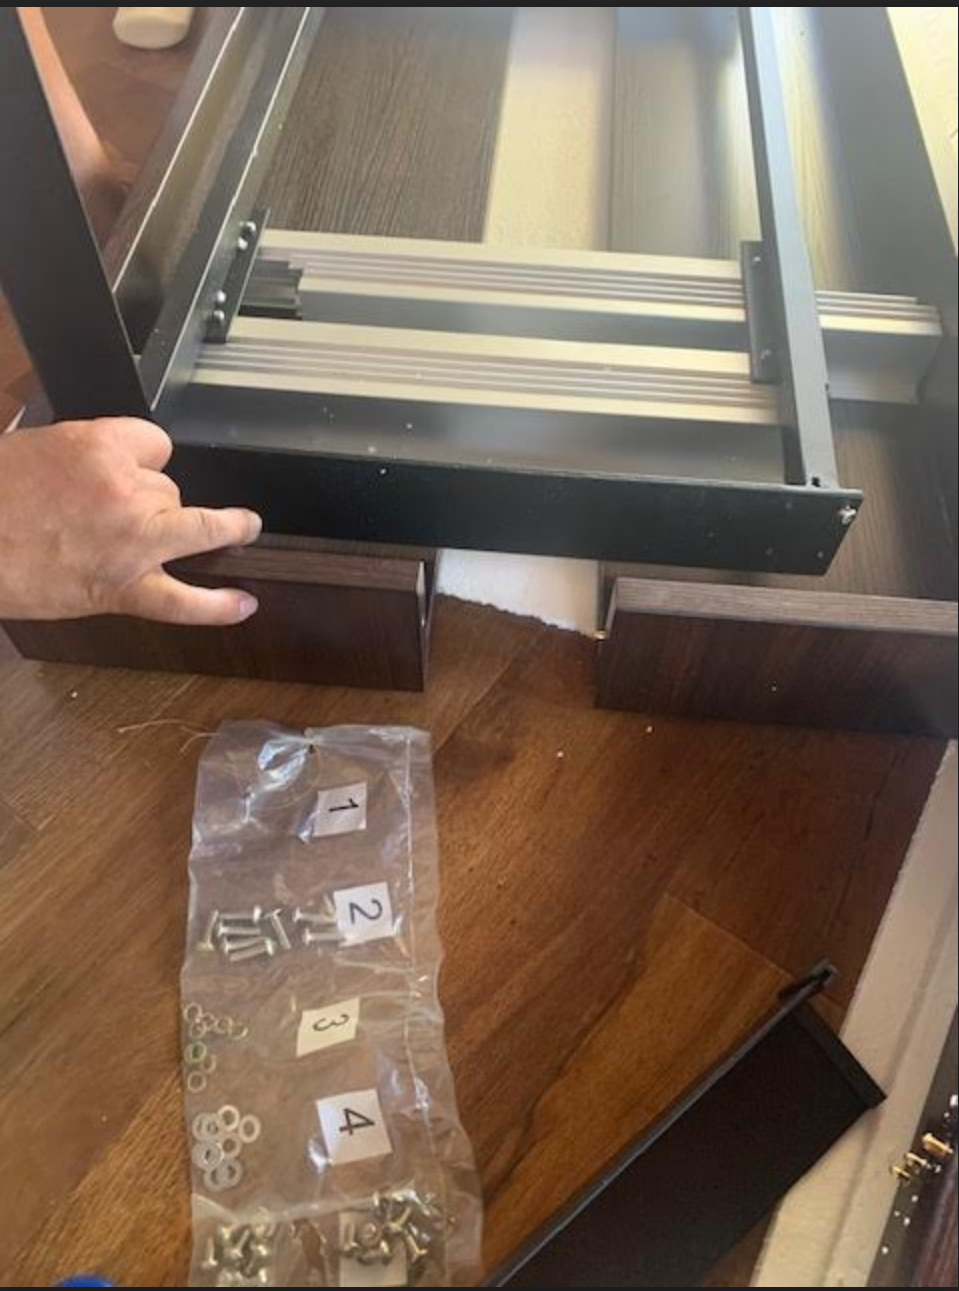
Step 2
Open table for easier attachment of metal legs
Install it on counter intuitive direction so when table is closed, the metal legs will fit around the wooden leg like a glove. Insert legs into each corner using wooden dowels to secure and then using the screws and washers Two of the metal legs have holes on different side than other set of metal legs.
(Be sure to use the correct metal legs for the corner you are working on so that it slides into the wooden table leg like a glove when table closed) See last photo below.
If the metal legs are incorrectly attached with the wrong orientation, you will notice right away once using the table as it will not close all the way and creates a gap in the table.
Attach two screws with two different washers on each wooden leg after set into dowels

Step 3
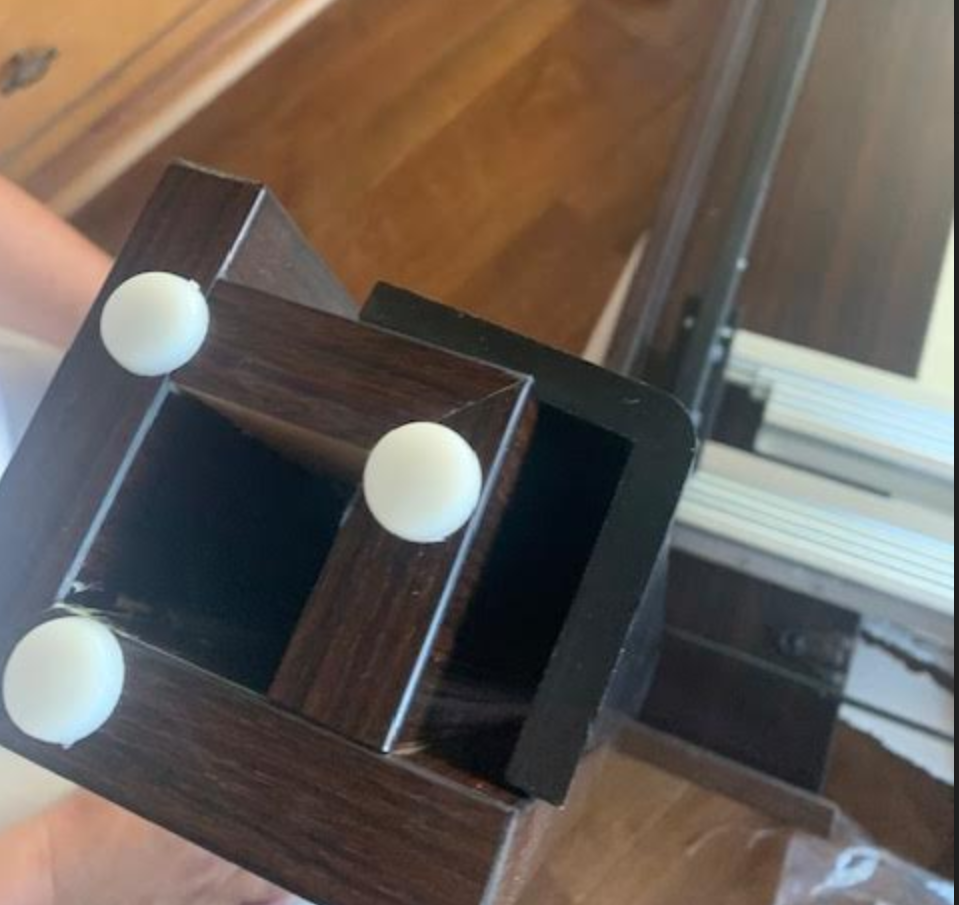
Place wooden dowels in holes – this is more just to prevent movement from side to side.
Push wooden leg down onto dowels and tap with a rubber mallet if you have one (lightly until firmly in place).
Repeat these three steps on all legs
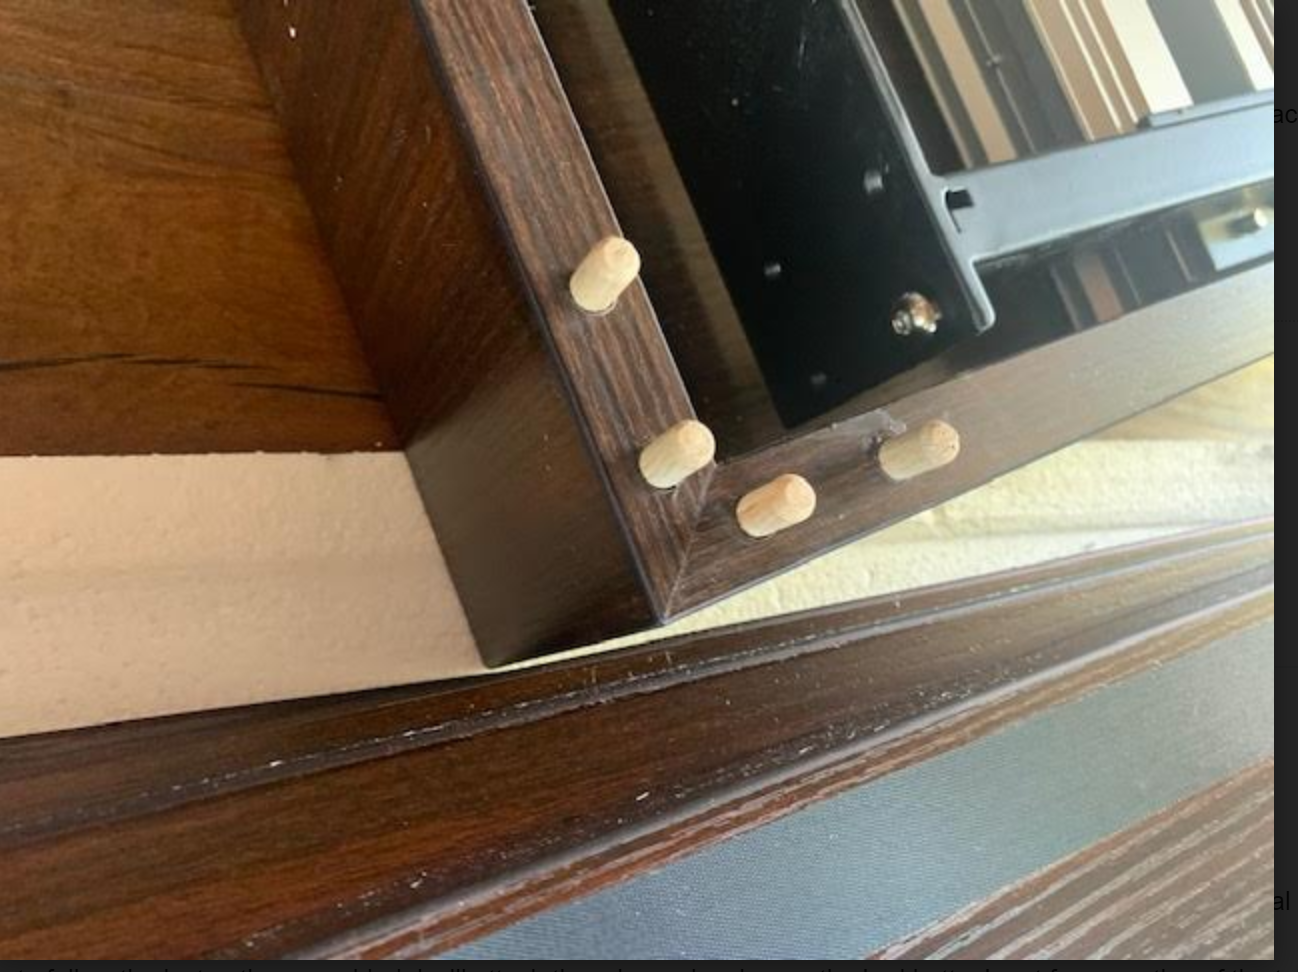
Below is the correct orientation with the metal leg fitting like a glove to the main tables leg.
This is not pushed in all the way yet but shows the correct idea, a small gap would not matter as long as the table functions properly.
Thanks for looking at our guide. If you need any more help please contact us.