
MurphySofa-Guide

The base install is the same for all MurphySofa models, the sofa pairing is unrelated. Below is a downloadable PDF but we also highly recommend you watch the video guide during your install.
Important Note: Expand Furniture Inc declines all liability caused by the incorrect assembly of the bed or failure to mount the bed. If you fail to mount the wall bed to the wall or correctly fasten it, we do not take responsibility for this.
The Horizontal wall bed has the same installation as the Vertical wall bed, the only difference being the orientation with the panels being wider and shorter so the same video and pdf guide can be followed. With the Horizontal wall bed it is best to use only 1 hydraulics per side on the back on each side, such as 1000N and leave the front hydraulic connection open, unless you have a very heavy mattress which is over 100lbs for example
PDF Manual for the MurphySofa Wall Bed Base Install
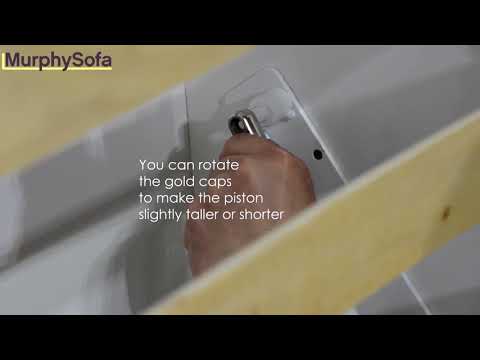
Manual For Piston Install Portion – Important
Helpful Notes & Tips for all installs:
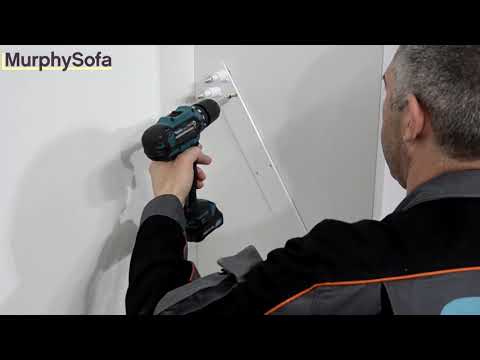
- Clear your room as much as possible before you start the install. Unpacking the panels will take some time, longer than many expect, so do this in advance of your install. You will need a power drill, screw driver, wall anchors and a ladder.
- We suggest you have your mattress before your install so you can test it during installation. The included pistons are meant for a mattress weight of 65 lbs or above. If your mattress is less than this please contact us for lighter pistons.
- All Hover & MurphySofa are do it yourself assembly and require wall mounts. It is up to you to determine your wall type, make sure it is safe and correctly mount the wall bed to your wall safely and properly. It is best to hit studs if you have drywall and make sure to use the correct wall anchors for your wall type. You can always install extra brackets and anchors for added security and peace of mind. Your local hardware store or your handyman/contractor should be able to advise on this. We suggest using anchors with weight capacity of at least 100lbs each and using 12 of them for added security. Toggler Snap Toggle Anchors have been a popular choice for Drywall with wood or steel studs. Please do your due diligence for your wall type.
Common mistakes or questions during the install:
- Once you install the pistons there will be strong tension on the bed frame. This is normal! After you have the face panel and the mattress the weight will be correct and it will work properly with normal tension. For this portion the metal frame should not be flush but it should go beyond flush (+3-5 inches) pushing inside the bed. After you add on the face panel and mattress it will move closer to flush and there will be ‘soft stoppers’ to hold it in place flush.
- The Face Panel Clips that join the face panel to the bed frame might need some minor adjusting. Install 1 face panel at a time and make sure it looks straight. Adjust if needed.
- Test both face panels before putting all the screws in. Drill in a few screws per panel for support and then test it by raising the bed up and making sure they look good. Make sure there is good inwards pressure on the frame and that it does not hang forward once you have your mattress on it.
- When installing the back panels (b2/b3) or face panels (a1/a2) you only use 3/4th of the screws/bolts. You are not short and you evenly space until you have none left.
- If you get stuck call or email us or hire a professional to finish off the job: https://expandfurniture.com/contact/
Please view the Piston install guide. This applies to all MurphySofa installs. If you are hiring a professional make sure they watch this video and install the pistons this way.

MurphySofa Install video:
The Queen, Twin, Full and King in vertical and horizontal all can be built using this guide. Put the Stronger (1000n) on the front, the the lighter on the back if they are different strengths. The Horizontal is the same process except the panels are wider and shorter. The horizontal requires only 1 x 1000n pistons on each side on the back (leave the front open) unless your mattress is very heavy (100 lbs +).
King Install Guide (Split bed frame is the main difference!)
Sofa Placement:
The system is modular and compatible with the Adagio, Clean, Minima, Stratus sofas which place in-front of the MurphySofa base unit.
The MurphySofa Clean Sofa feet need attaching, there is an outline underneath where to attach but you can also refer to this photo:
(You want to have the feet underneath both the arm and the base to distribute the weight best, then drill them in.)

If you have a Sectional Clean unit and need to reverse the Chaise, scroll to the very bottom of this page to see the video.
Trouble Shooting:
If your face panel is not flush (hanging forward) and you have already screwed in the face panel, or you need to change a piston watch this guide: Please take great caution when doing this.
Back Panels: If you are missing 4-6 screws this is normal. B2/B3 do not require every hole to be fixed into the sides/top of the bed just spread them out evenly and leave a few empty. If you are having trouble threading a particular hole move to the next one.
Face Panels: If you are “missing” screws this is normal. A1/A2 do not require every hole to be screwed in. Just spread them out evenly and leave a few empty.
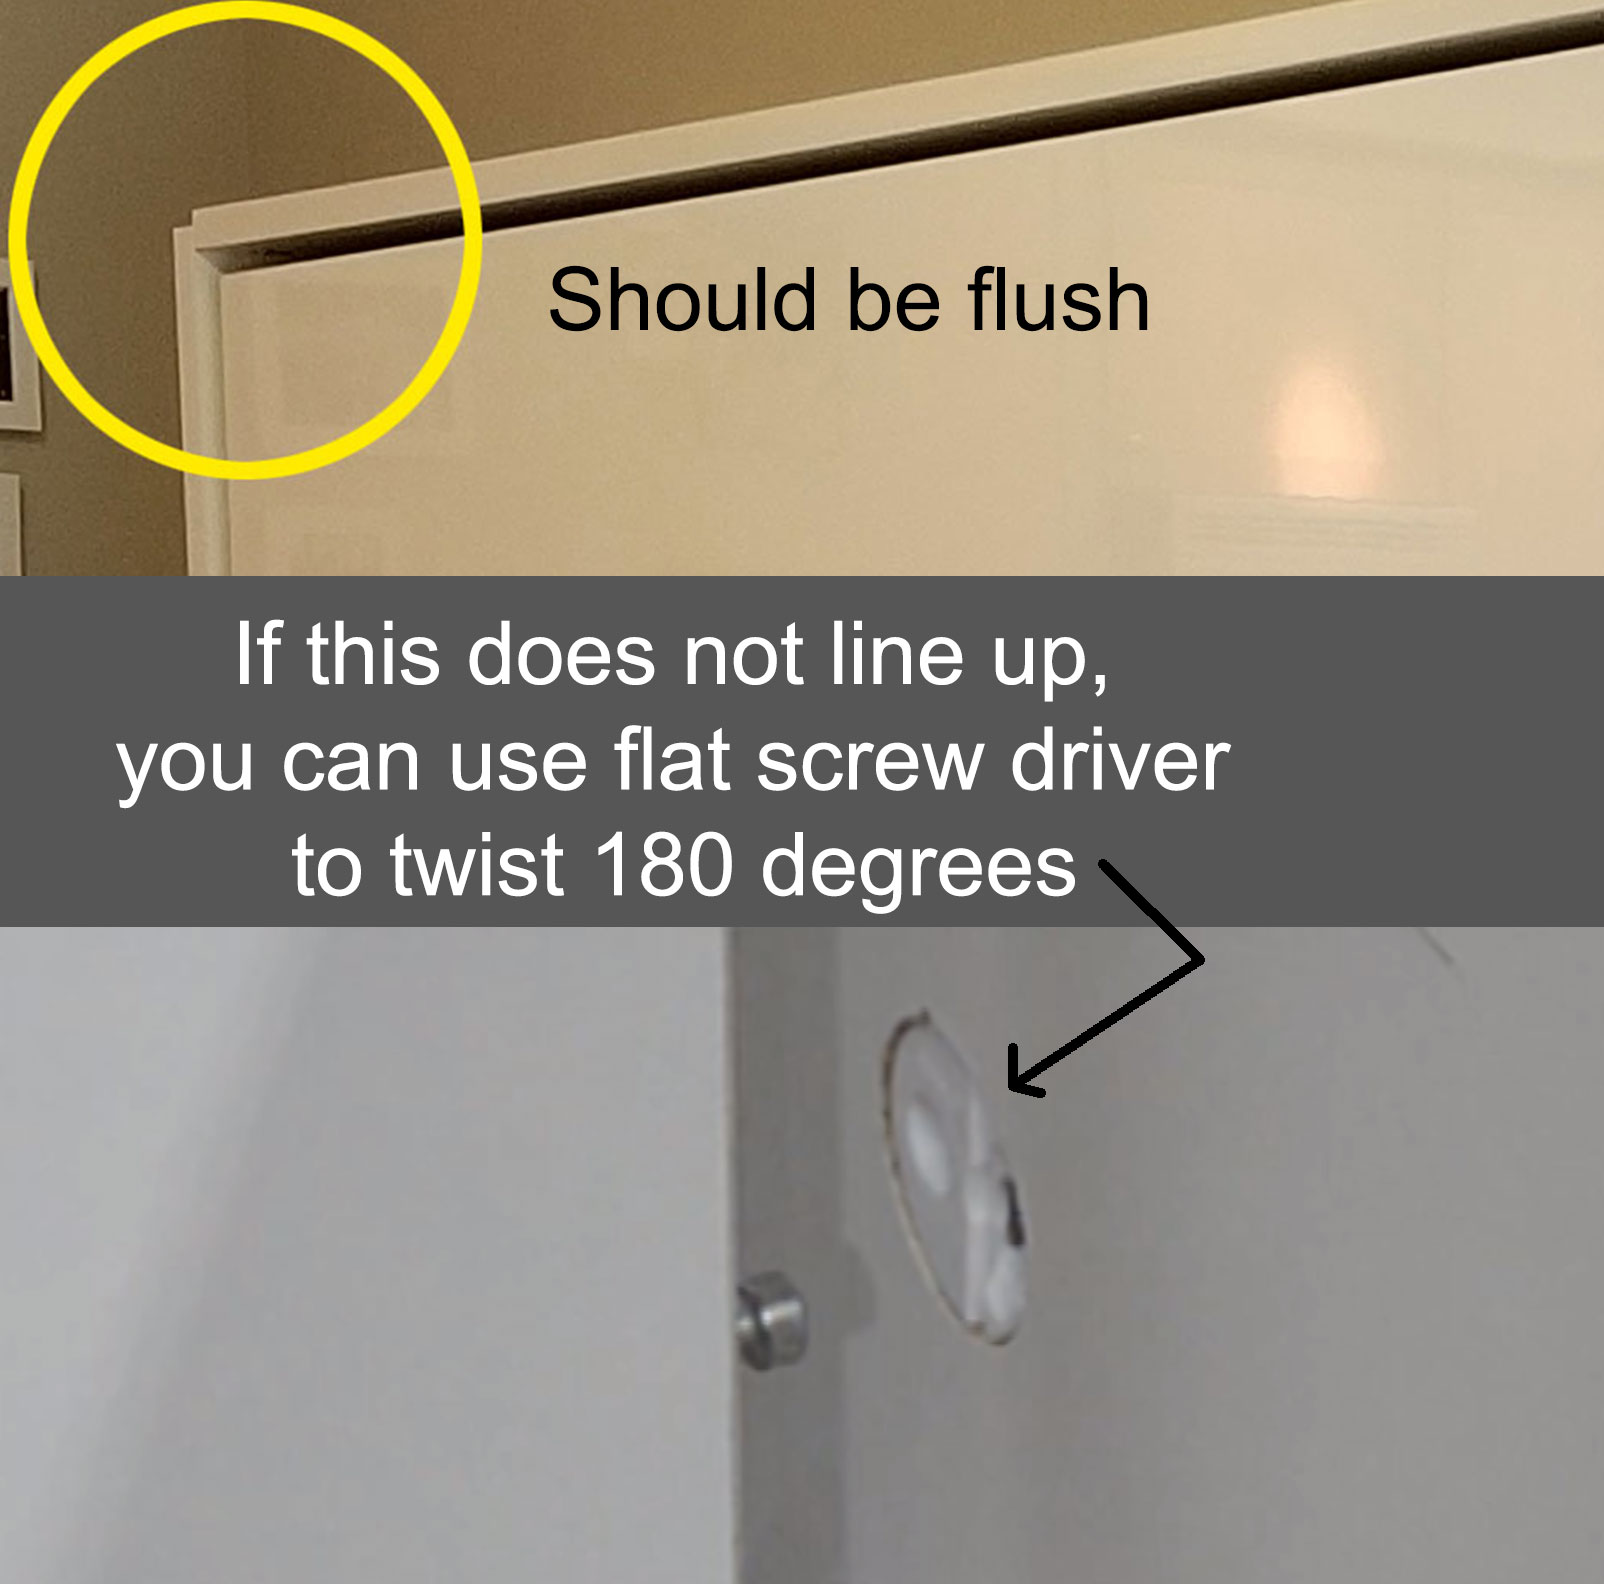
Something not lining up with a panel? If it is this style of lock below, they can be rotated 180 degrees with a flat head screw driver.
This type of lock is typically used on our cupboards and some MurphySofa beds.
Video Installs of the 60 & 100cm Cupboards
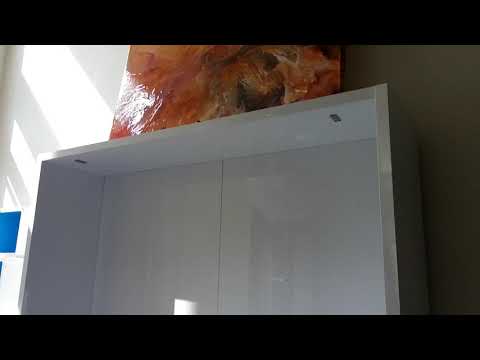
MurphySofa Shelving can be built and placed next to the MurphySofa. Mount it to the wall above for stability when complete. You do not need to attach this to the MurphySofa!
PDF manual for 60 cm side shelf with storage box
100 and 60cm Magnet attachment detail:
At 26:35 into the 2023 100cm cupboard video or 11:37 in the 60cm video, some of the newer inventory will have a hole to add the metal to connect to the magnetic spring by tapping this into the door – instead of a thin piece of metal which you peel the plastic off of – as shown in the video. Please email or call if you have any questions related to this, the hole would be from a 6mm drill bit and 10mm deep.
New 2024 100cm Cupboard installation video:
The below video is a slightly older video from 2023 and before for the 100cm cupboard:
Please watch the newest video above this instead. You can also refer to this older product video if you prefer for some pointers.
MurphySofa Clean Chaise reversal: If you have a MurphySofa Clean Sectional and you want to reverse the Chaise watch this guide:
Murphysofa Maintenance
For best long term use we suggest just cleaning the bed with a Swiffer or duster, and avoid moisture if possible.
For a deeper clean: Wipe with warm, soapy water on a soft damp cloth. Dry thoroughly.
Dust may build up on the bottom of the cabinet inside the wall bed. With the bed opened this area can accessed from underneath and be cleaned with a duster or a vacuum on occasion.
Dust might build up above the bed, a duster can be used here to clean.
Mount/Anchor checks: We suggest you check in on your wall mount and anchor install on occasion to make sure it is still strongly secured.
More help?


