Compatto Revolving Guide
Thanks for purchasing the Compatto Revolving Wall Bed
Important Note: Expand Furniture Inc declines all liability caused by the incorrect assembly of the bed or failure to mount the bed. If you fail to mount the wall bed to the wall or correctly fasten it, we do not take responsibility for this.
Helpful Notes & Tips for all installs:
- Clear your room as much as possible before you start the install. Unpacking the panels will take some time, longer than many expect, so do this in advance of your install. You will need a power drill, screw driver, wall anchors and a ladder.
- All Compatto installs are do it yourself assembly and require wall mounts. It is up to you to determine your wall type, make sure it is safe and correctly mount the wall bed to your wall safely and properly. It is best to hit studs if you have drywall and make sure to use the correct wall anchors for your wall type. You can always install extra brackets and anchors for added security and peace of mind. Your local hardware store or your handyman/contractor should be able to advise on this. We suggest using anchors with weight capacity of at least 100lbs each and using 8 of them for added security. Toggler Snap Toggle Anchors have been a popular choice for Drywall with wood or steel studs. Please do your due diligence for your wall type.
The basic assembly is the same for the all models. The Shelf & TV are the same model (you just install a TV or shelves).
1. LMG Vertical Table Assembly
2. LMG Office Horizontal Table Assembly
3. LMG Shelf or TV model Assembly
Click Here on the Guide to install a TV or Monitor to your Office or Shelf-TV systems
Please note for the Shelf-TV model and the Office model the intended design is to have the shelves facing down when installed.
You can optionally install it the other way but you will see some more hardware and we recommend installing it face down.

Final touches: For the Shelf/TV and Office models when you remove a shelf for monitor installation you will have exposed shelf holes. These are covered up with panel match round stickers. We also have bolt covers.
For the Office – Horizontal Table or the Single-Twin Revolving install portion please see the video at the bottom of this page by scrolling down.
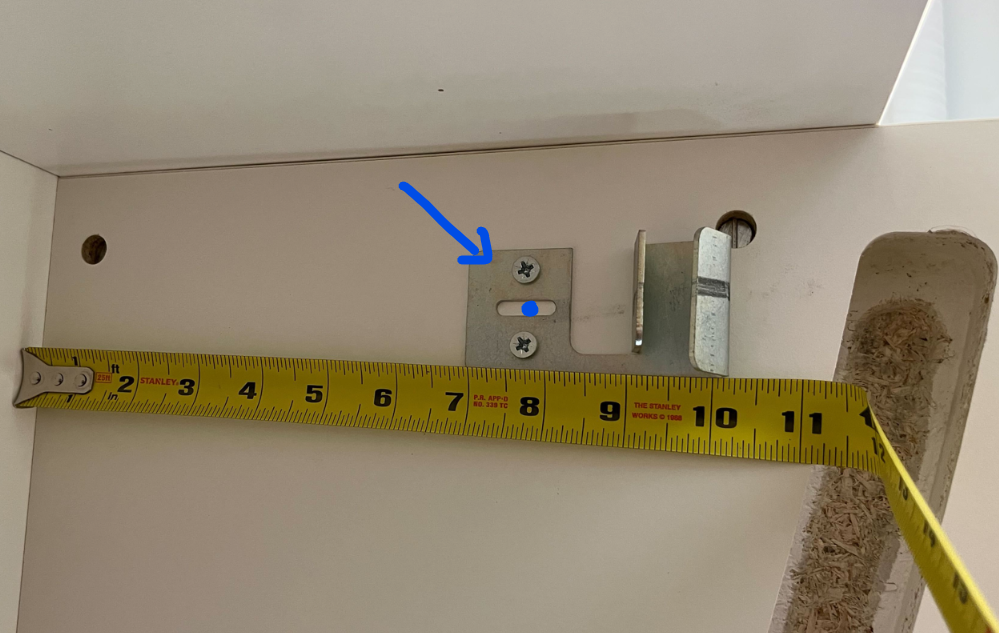
Lock Guide:
On the left side of the system you are to install the lock here. The latch bolt is to rest in between the metal bracket opening.
This can also be viewed at the end of the bottom video for placement reference.
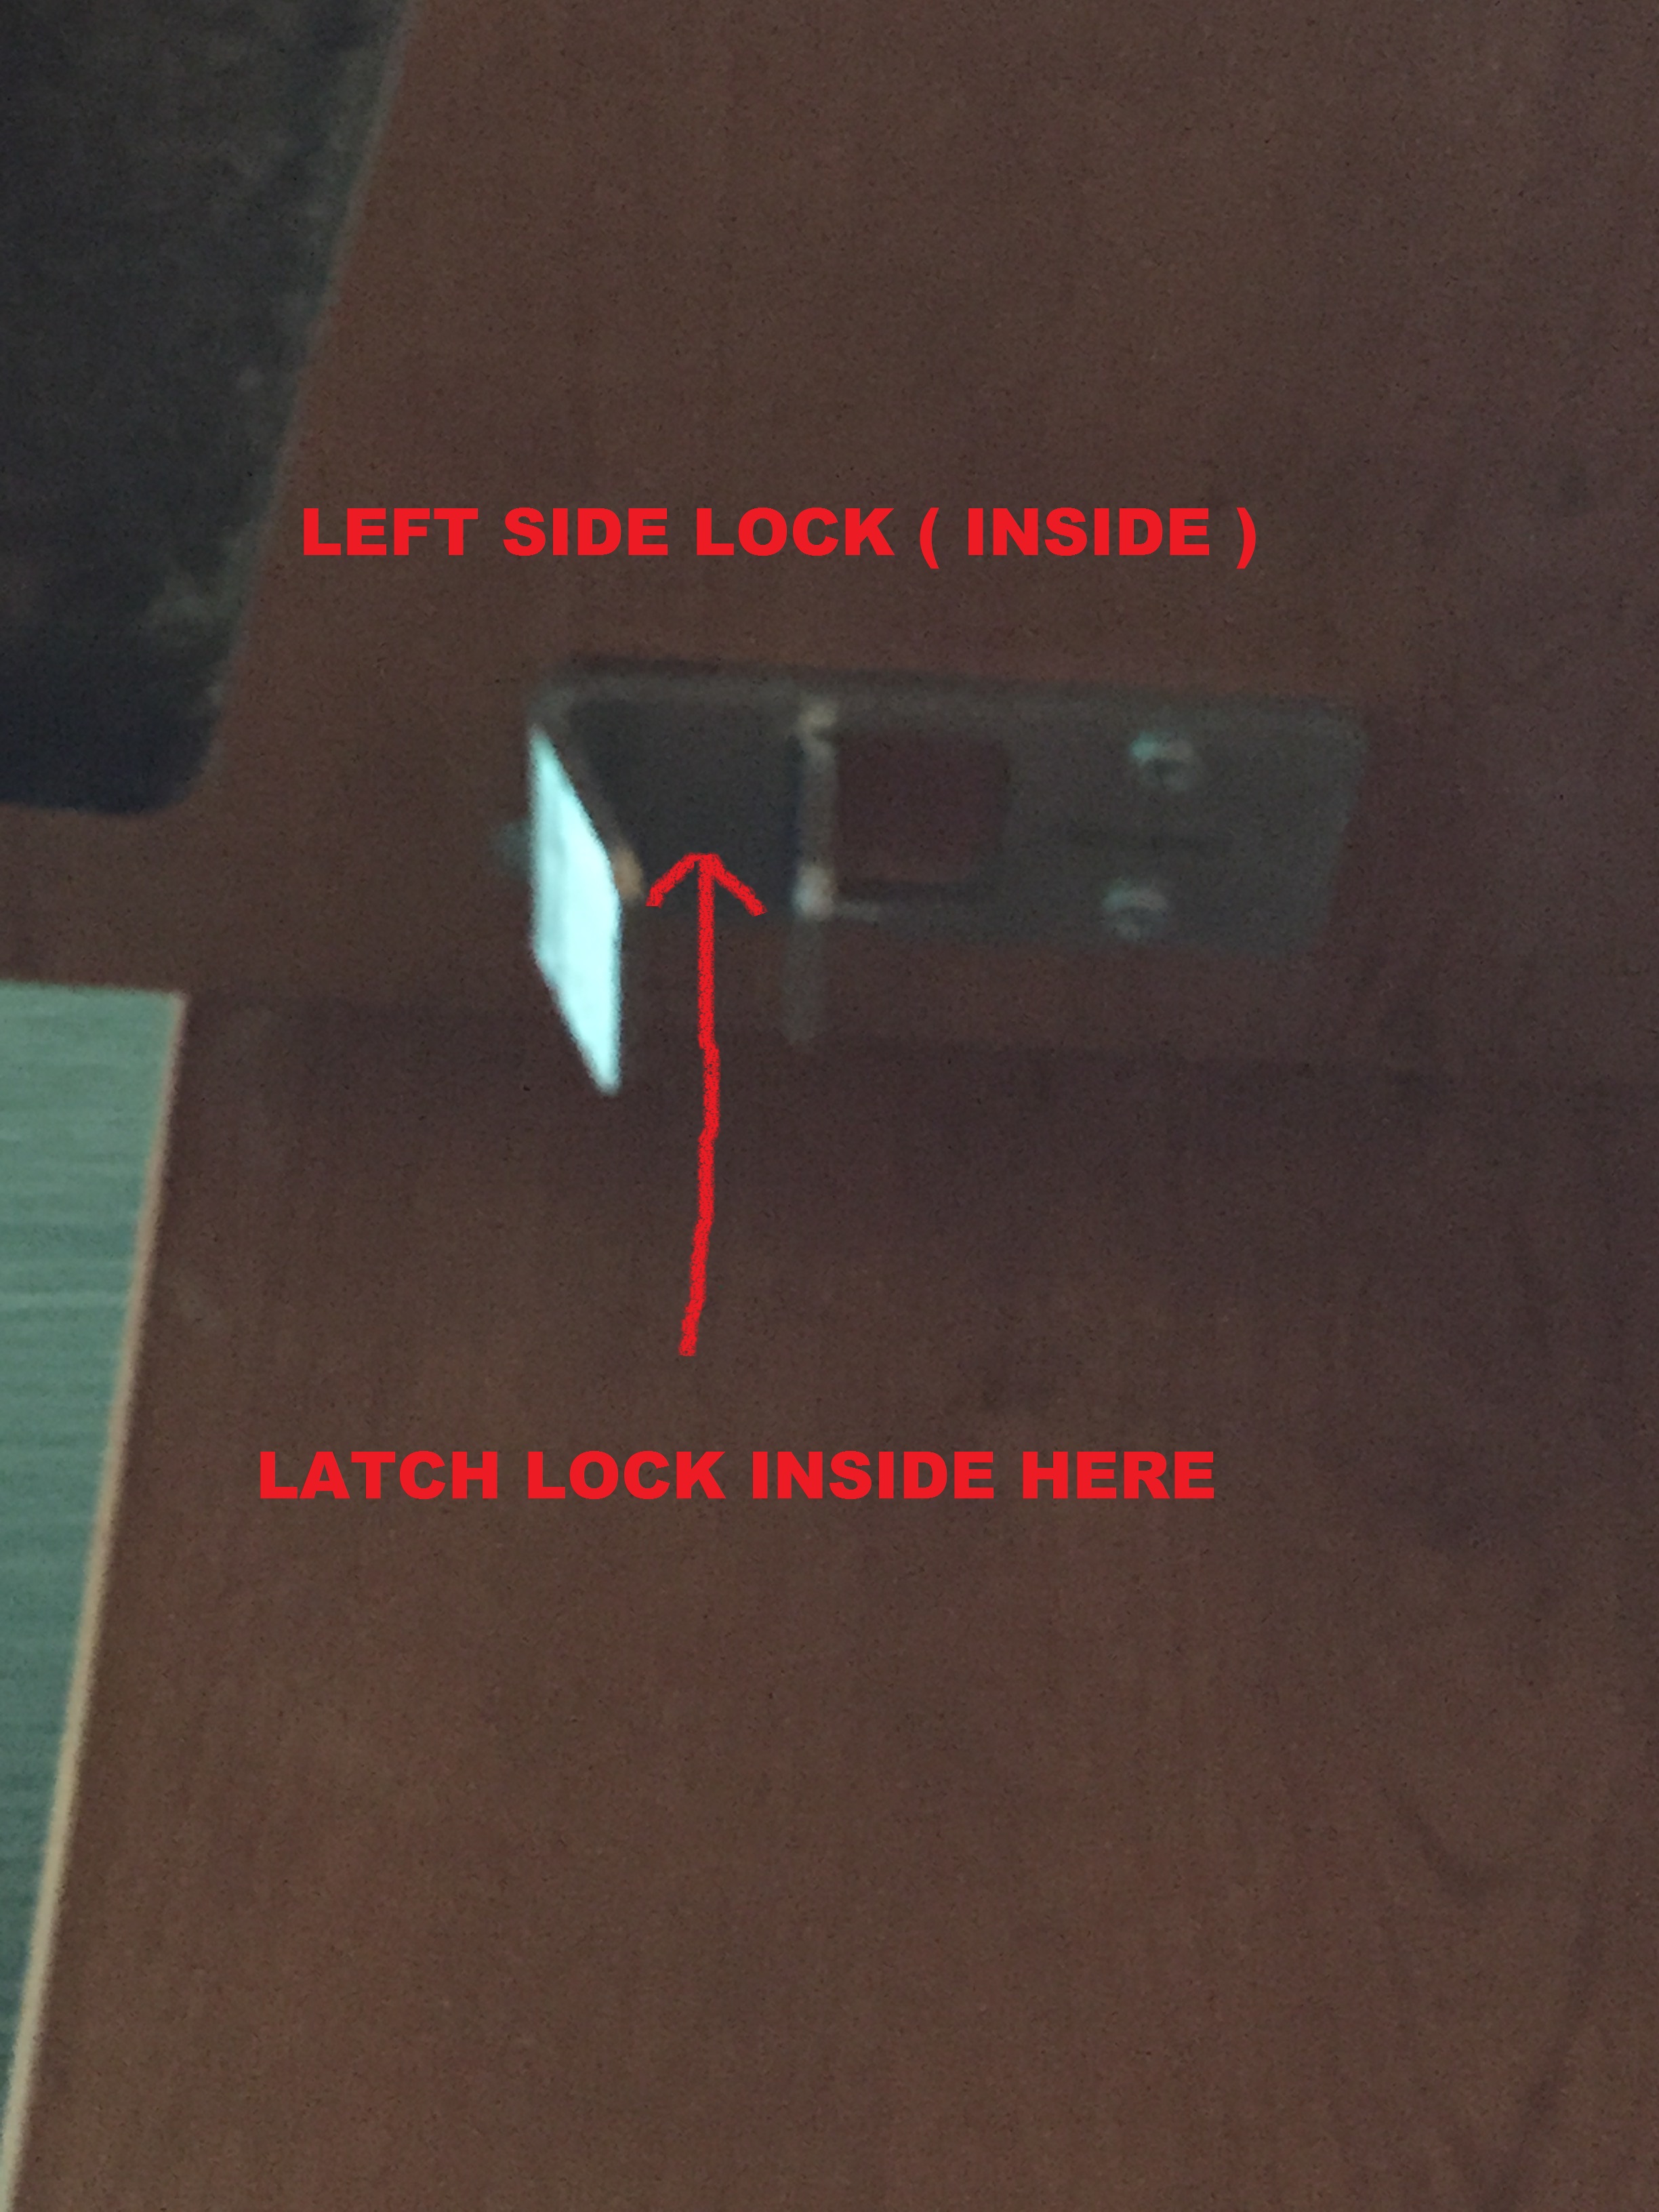
Here is a reference of where to place the lock metal. Note the circular hole.
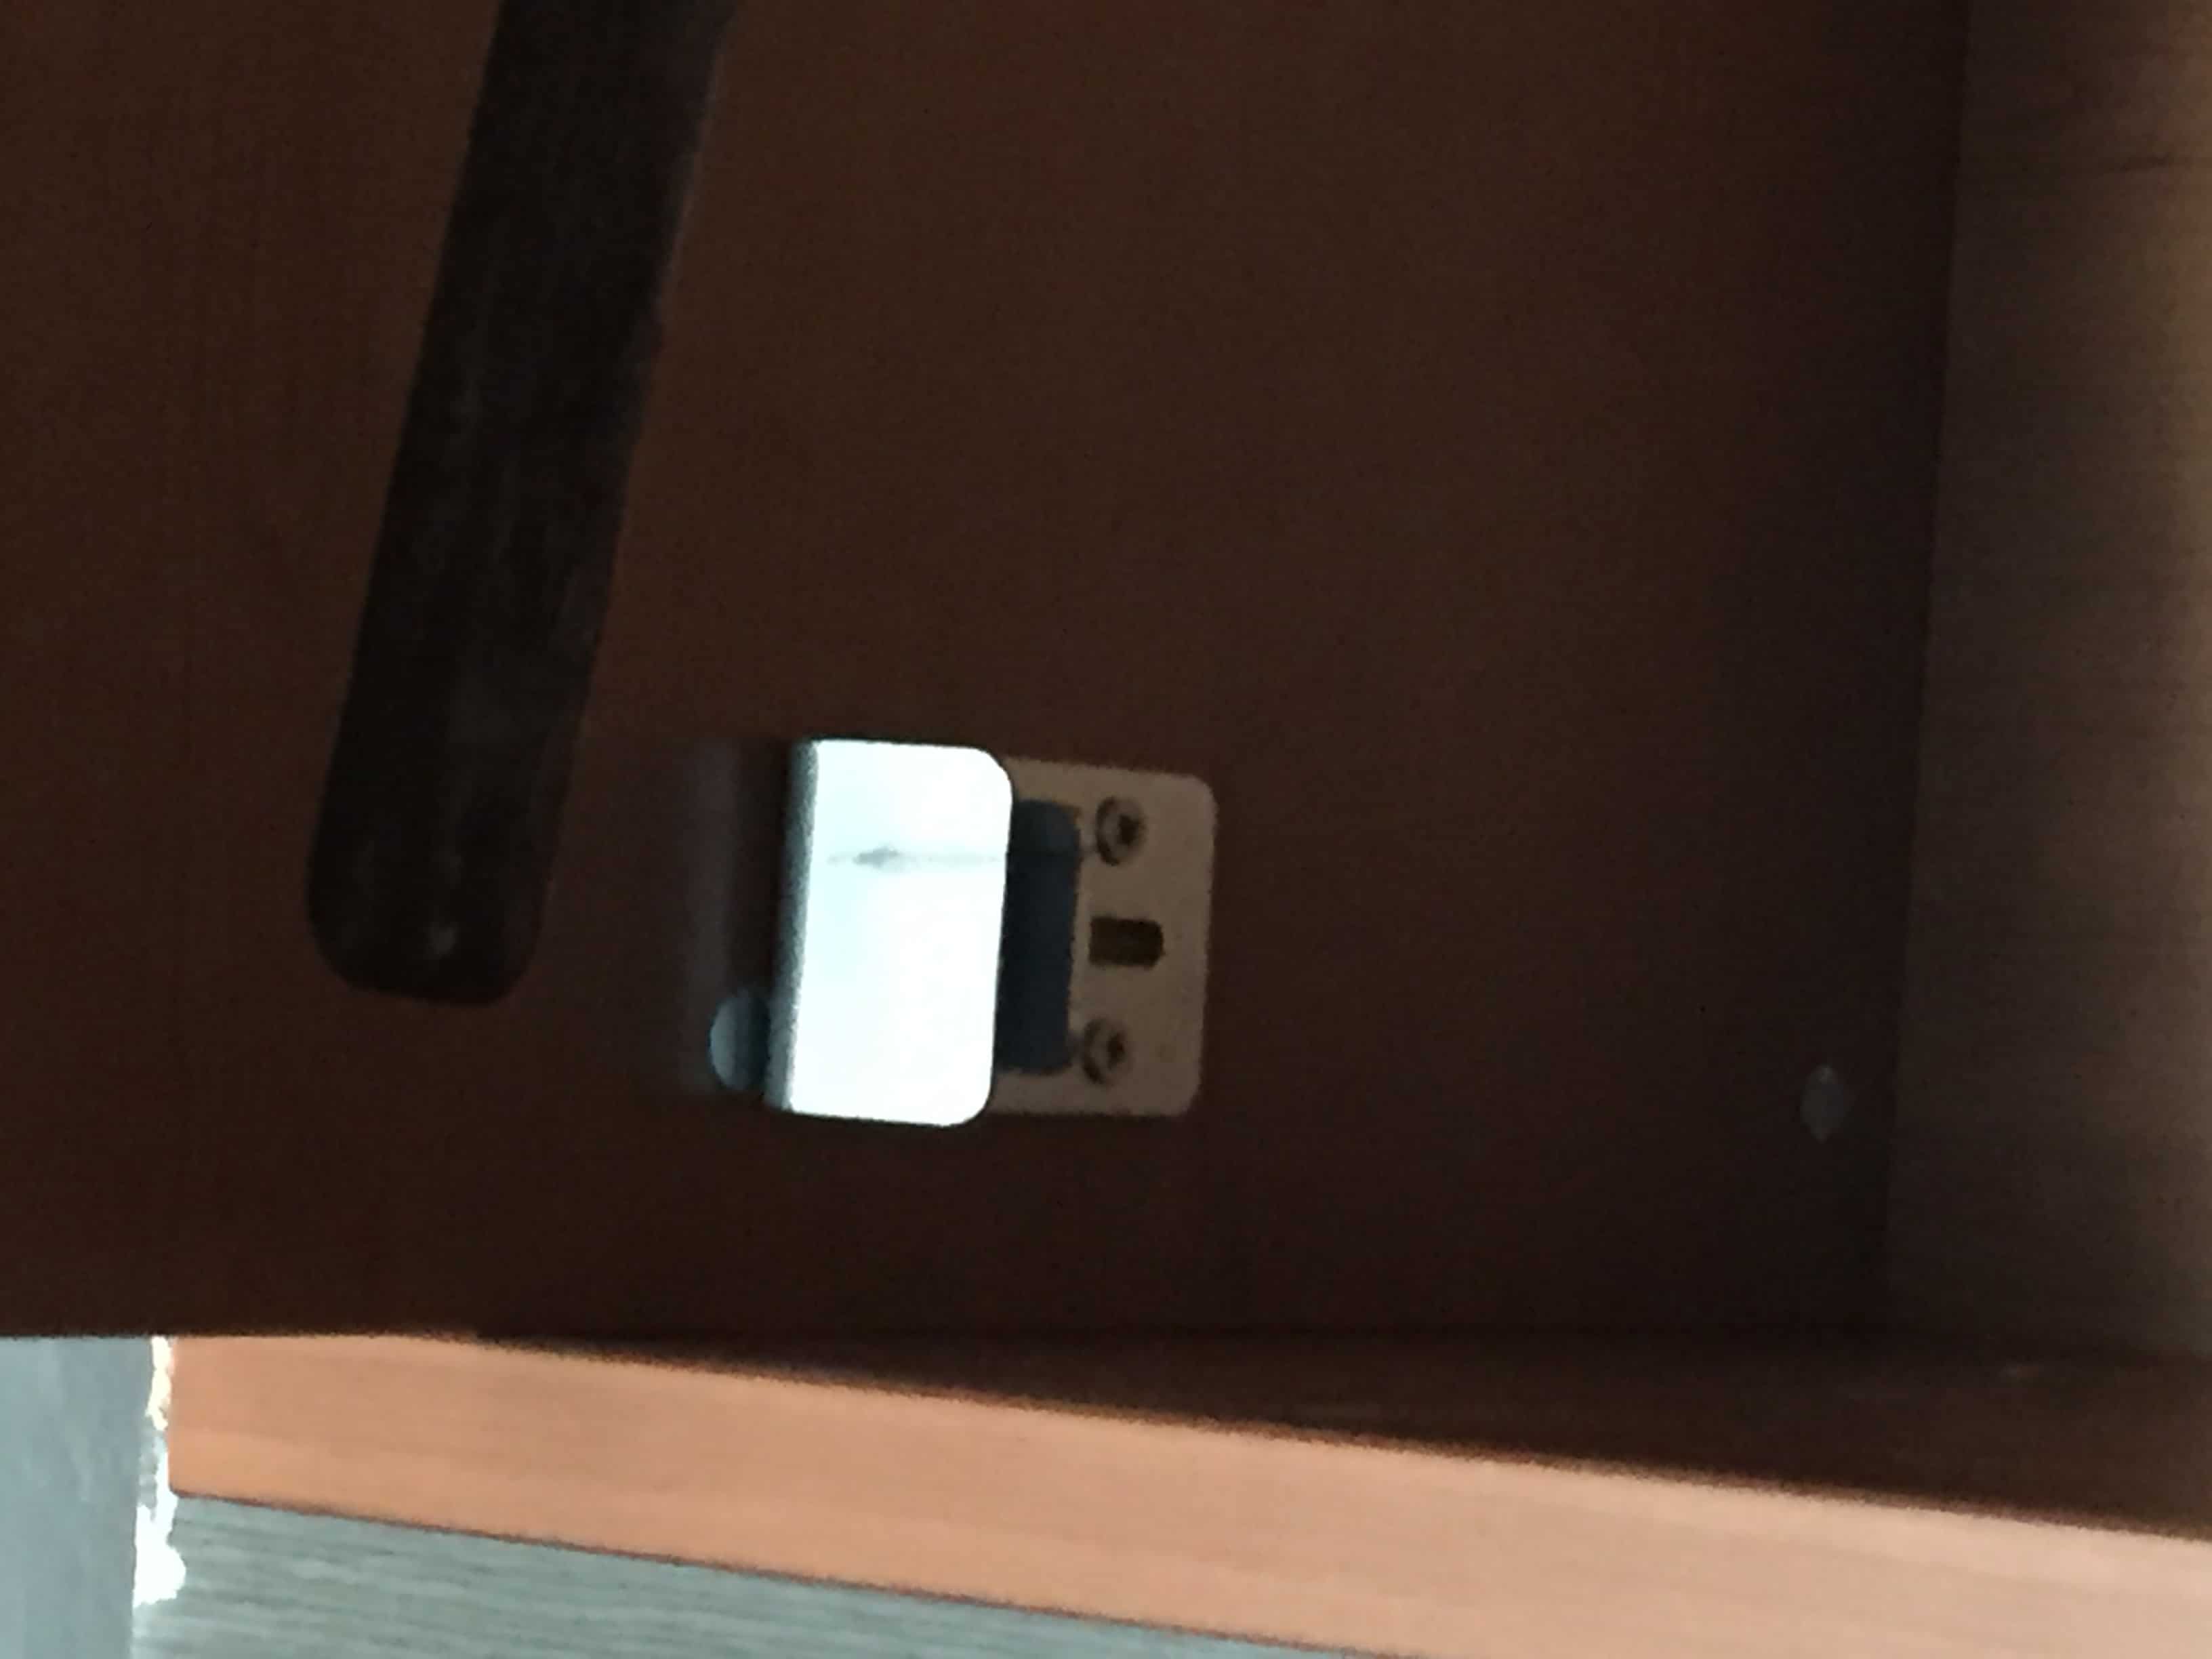
Latch Bolt: Here is a picture of the Latch Bolt resting in front of the lock area. You would pull the latch down and move it forward a half inch so it rests in between the metal work to hold it securely.
Placement can vary: It is best to rotate your unit to where it is closed and flush and then try measure and mark this before screwing in the lock
Our reference below was tested at ~7 2/3rd inches from the back and 2 1/3 inches from the side. We marked it with a pencil where the Blue dot is.
You could also optionally add just 1x screw in the middle (blue dot) when you have the approximate spot (not using the left and right holes yet), then test the unit and this still allows you to slide forward or back after loosening the screw. Then it can be reset and 1 or 2 screws go in the other holes once you are happy.
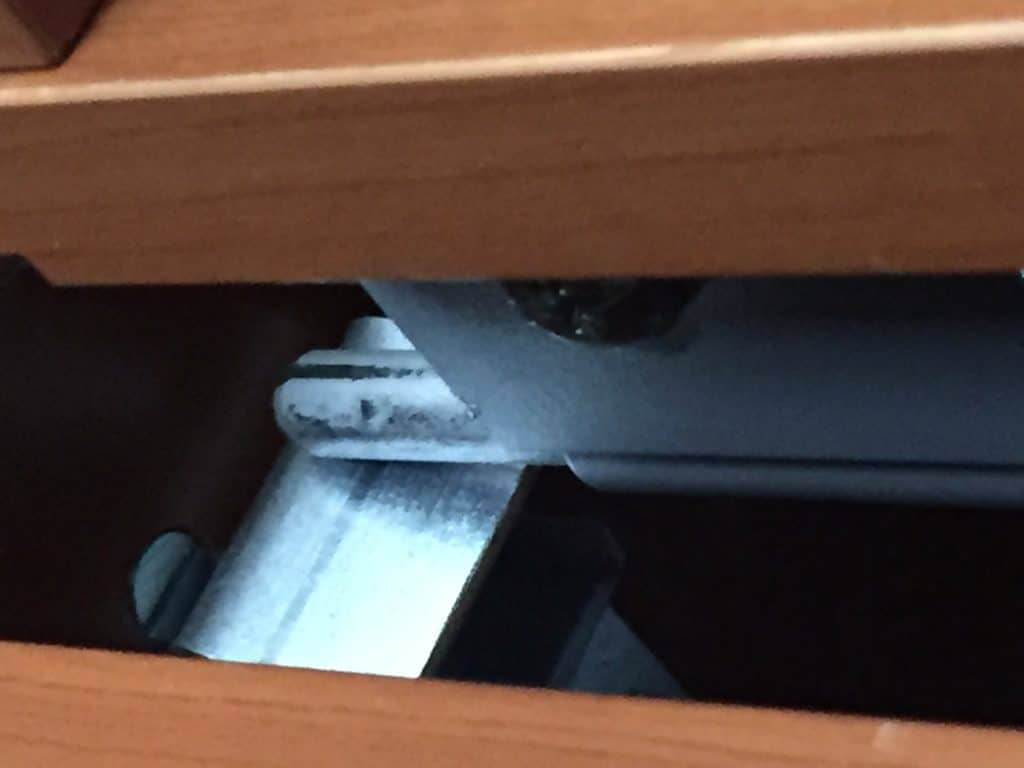
Setting your rollers and checking rotation.
Before putting on any decorative objects on your shelves make sure you have optimally set the rollers. These rollers can adjust up and down in height. There is one at the top of the lateral frame and one at the bottom. Make sure the rollers are not too short that they could leave the track. If they are too tall you might have friction. These rollers balance each other so please note if you adjust the top it will affect the bottom also. Adjust it so both are properly deep inside the track but not conflicting. Test and rotate the unit to make sure it is working well before adding decorative items to your shelves. If your unit is having difficulty moving and you feel friction the roller could be touching and might need to be adjusted slightly. It is important to make sure the rollers are both deep inside each track and cannot come out. Below is an example image showing where you can adjust the roller. In this case it could be raised very slightly if it is touching the bottom of the track.

Back Join Bar:
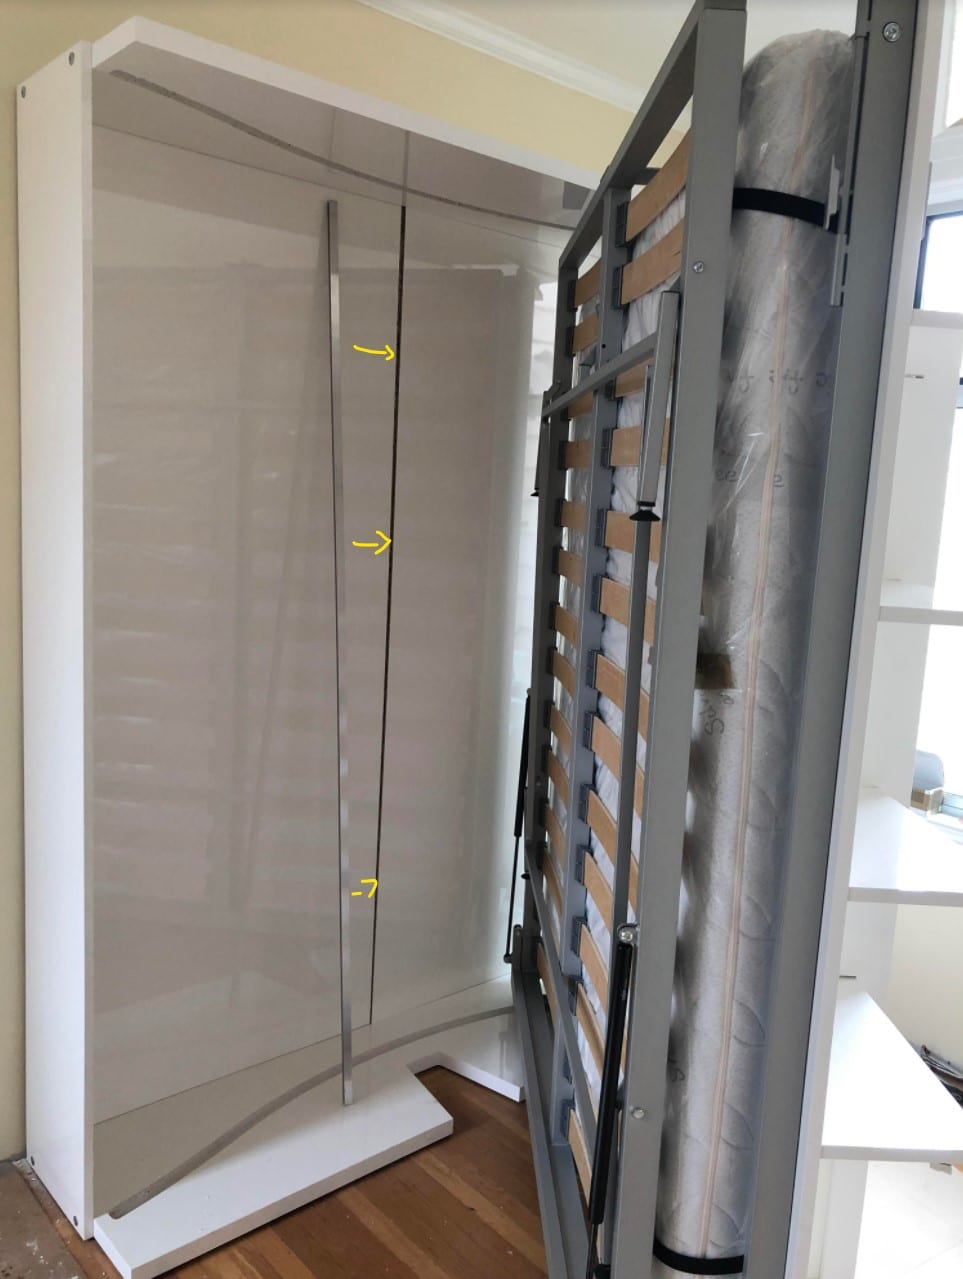
On page 5 of the manual, you will want to insert this metal beam between the C1 and C2 piece for an improved aesthetic look.
If this is not installed this is fine, and is only noticeable when looking for the piece.
If you have softwood floors, it may be best to lay down a rolling mat to avoid any indentations in your floor where the center moves as the unit rotates around, or you can have a firmer surface to help distribute the weight around. If you have thick carpets, it may also help to have a rolling mat if you find the unit is not moving as smoothly. We can get a metal plate for this purpose as well, inquire if interested. This does not need to be a specialised piece as this is just making a smoother surface for the wheel to roll on and distribute the weight on the floor.

Decorations and weight capacity:
The system is best used for a mix of storage and decorative items rather than only heavy stored items.
We suggest putting heavier items in the middle to better balance when rotating. (the weight is then on the center wheel rather than the outsides where turn)
For example you might have some books in the middle of a shelf and then some plants or other decor on the outside.
Please make sure you have set your rollers to the correct height before placing items on the shelves. The rollers need to be set to the optimal height for the track.
Bedding:
This system is very compact and designed to be thin and functional. You will have room for sheets and a thin duvet but a thicker blanket or pillows will not close in this system. Consider leaving just the sheet on and adding other bedding once the bed is open.
Maintenance
For best long term use we suggest just cleaning the bed with a Swiffer or duster, and avoid moisture if possible.
For a deeper clean: Wipe with warm, soapy water on a soft damp cloth. Dry thoroughly.
Dust may build up on the bottom of the cabinet inside the wall bed. With the bed opened this area can accessed from underneath and be cleaned with a duster or a vacuum on occasion.
Dust might build up above the bed, a duster can be used here to clean.
Mount/Anchor checks: We suggest you check in on your wall mount and anchor install on occasion to make sure it is still strongly secured.
Revolving LMG Bed with Horizontal Table. Please watch the video here on how to attach the table:
Video Guide for the Single Revolving units
Metal attachment to the D1/D2 panels:
In 2024 some models will start require a new step to attach metal structure to the side panels. If your model requires, here are the steps to re-attach the metal:
Step 1: remove the bolts that are in the long metal bars (you will use these to attach them into the panel)
Step 2: Place the metal bar on the corresponding panel – they are labelled 1 or 2 to match to the right area
Step 3: Screw in the bolts to secure the metal to the panel. D1 panel requires you to remove the small latch knob as seen in the video
Trouble shooting:
Piston Attachments. Pistons are attached when the bed is in the vertical position. You cannot push the piston down by hand, so they are attached while extended.
If you have trouble attaching the piston in the upright position like in the example below, you can solve this by using a thinner bolt. A thinner bolt around M2/M3/M4 would work – example here is M3. This is more than strong enough and approved by the factory engineers.


Please use the Swapping vertical table guide when replacing a vertical table. The most important measurement to be precise with is the 6cm measurement shown on the first page.
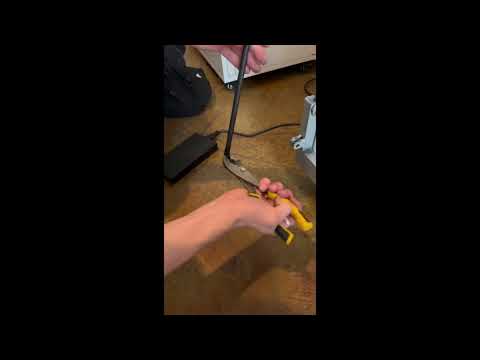
Rotating Piston
If the piston is not lining up correctly on the bed, it can be rotated. If you attach the piston on the top end (to the frame) and use a pair of pliers it can be rotated to fit correctly. See video below: